HomeBlogsBlogsHow to Change a Tyre

How to Change a Tyre

How Do You Change a Tyre Safely at the Roadside?

A puncture never picks a good moment. It turns up on the school run, halfway to a meeting, or twenty miles from home with the rain coming down. The reassuring part is that changing a tyre is a job most drivers can manage in roughly twenty to thirty minutes, as long as the car is parked somewhere sensible and the right kit is sitting in the boot.

This guide walks through how to change a car tyre from start to finish with images, in plain English. You will find out how to judge whether it is safe to do the work at all, what tools you actually need, the correct order of the steps, and the checks that stop a wheel working loose afterwards. It also covers the awkward situations — no spare in the boot, a missing locking wheel nut key, or a flat tyre on a motorway — where the sensible move is to stop and get help out to you.

Short Answer

Park on firm, level ground well away from traffic. Put the handbrake on and the hazard lights on, then chock the wheel diagonally opposite the flat one. Loosen the wheel nuts while the tyre is still touching the ground. Jack the car at the manufacturer’s jacking point, take the nuts and wheel off, lift the spare on, and nip the nuts up by hand. Lower the car, tighten the nuts fully in a diagonal star pattern, then check the spare’s pressure before you set off. Get the damaged tyre repaired or replaced as soon as you can.

Before You Touch the Wheel: Is This a Safe Place to Stop?

Drivers are rarely hurt by the puncture itself. They are hurt by where they chose to deal with it. So the immediate priority is not the wheel at all — it is three quick judgements: the ground under the car, how much room you have away from moving traffic, and how easily other drivers can see you.

A jack only works on a firm, flat surface. On a soft verge, a camber or loose gravel it can sink or lean, and a car that slides off a jack cannot be caught by anybody.

Where it is sensible to change a wheel yourself

  • A driveway, car park or quiet side street with level, solid ground
  • A proper lay-by with enough room to work on the kerb side of the car
  • A service area, where you are well back from fast-moving traffic
  • Anywhere you can work on the passenger side rather than the traffic side

Where you should not attempt it at all

The hard shoulder of a motorway is the obvious one. Traffic passes at seventy miles an hour a couple of feet away, and the draught from a passing lorry alone is enough to knock somebody off balance. National Highways is blunt about it: do not try to repair a vehicle there. Leave through a left-hand door, get behind the safety barrier, and call for help.

The Highway Code breakdown rules say much the same, and add one detail worth remembering: a warning triangle goes at least 45 metres behind the car on ordinary roads, and never on a motorway at all.

Roadside Safety Checklist

  • Handbrake on hard, engine off, first gear or ‘P’ selected
  • Hazard lights on, plus sidelights if it is dark or foggy
  • Everyone out of the car and behind a barrier or well up the verge
  • Hi-vis vest on if you have one, and a torch if the light has gone
  • Warning triangle 45 metres back — ordinary roads only
Where you have stopped
Safe to change it yourself?
Driveway or private car park
✅ Yes — the safest option by far
Quiet, level side street
✅ Yes, with hazards on and passengers out
Lay-by on an A road
⚠️ Only if you can work on the kerb side
Soft verge, grass or a slope
❌ No — the jack can sink or tip
Hard shoulder or a live motorway lane
❌ Never — call for help
Unlit road at night, on your own
⚠️ Only with a torch, hi-vis and clear space

Key Rule

If you are asking yourself whether the spot is safe enough, it almost certainly is not. A wheel change can wait for a fitter to reach you. Standing beside a live lane cannot wait for anything. In those situations, emergency roadside tyre fitting is the safer call.

What You Need in the Boot Before You Start

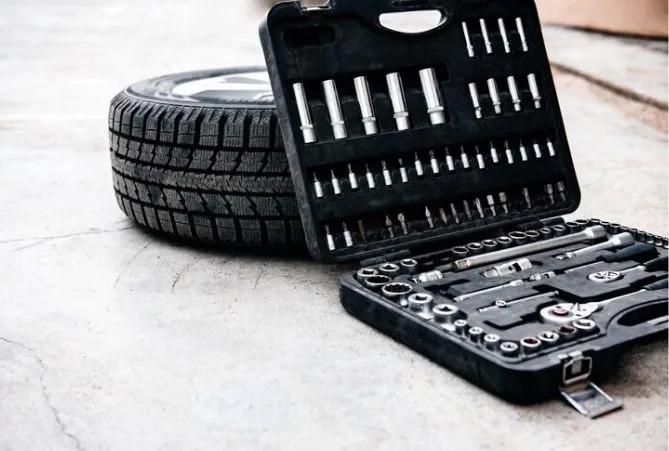
Most cars leave the factory with just enough kit to change one wheel. The trouble is that it lives under the boot floor, and plenty of drivers only discover something is missing at the worst possible moment. Ten minutes checking it on the driveway saves an hour standing in the rain later.

The basic tyre changing kit

Item
Why you need it
If it is missing
Jack
Lifts one corner of the car at the reinforced jacking point
Do not improvise with blocks or bricks — call a fitter
Wheel brace or socket wrench
Loosens and tightens the wheel nuts
A cross-shaped brace gives far more leverage than the folding one supplied
Locking wheel nut key
Removes the one security nut fitted to each wheel
The wheel will not come off without it — see what to do if the key is lost
Wheel chocks
Stop the car rolling once a wheel is off the ground
A brick or a solid block of timber will do at a push
Spare wheel or sealant kit
The thing you are actually fitting
Check tonight which one your car carries
Torch and gloves
Light and grip — wheel nuts are filthy
A phone torch works, but it ties up one hand
Hi-vis vest and warning triangle
Makes you and the car visible to others
Keep both in the cabin, not buried in the boot
Torque wrench (optional)
Tightens the nuts to the exact figure in the handbook
Tighten firmly by hand, then have them checked properly

Worth Checking This Weekend

  • Does the spare still hold air? A flat spare is no spare at all.
  • Is the locking wheel nut key still in the glovebox or boot?
  • Does the brace actually fit your wheel nuts squarely?
  • Is the jack complete, with its handle, and does it wind freely?

Know Which Kind of Spare Your Car Carries

Not every car has a spare wheel any more. Manufacturers save weight and boot space by supplying a sealant kit instead, and a lot of drivers do not find out until they lift the boot floor at the roadside. What you have decides what you can realistically do.

Type
What it is
What it means for you
Full-size spare
A matching wheel and tyre
Fit it and drive normally; sort the damaged tyre at your convenience
Space-saver spare
A narrow steel wheel, usually marked 50 mph
Temporary only — grip and braking are noticeably reduced
Sealant and compressor kit
A bottle of sealant plus a 12V pump
Small tread punctures only; no use on a split or a burst
Run-flat tyres
Reinforced sidewalls, so no spare is carried
Limited speed and distance — see our guide to run-flat tyres
Nothing at all
Some cars carry no provision whatsoever
Mobile fitting or recovery is the only route

Space-Saver Rules

  • Keep to 50 mph (80 km/h) unless the sticker on the wheel says otherwise.
  • Treat it as a get-you-home wheel, not a full spare tyre.
  • Fit it to a non-driven axle where your handbook allows it.
  • Swap it for a full-size tyre quickly — braking distances are longer on one.

How to Change a Tyre: 10 Steps From Start to Finish

Work through these in order. The sequence matters more than speed. Loosening the nuts before the car goes up, and tightening them after it comes back down, is the difference between a routine job and a wheel that works loose on the way home.

Step 1 – Secure the car

Switch the engine off

Pull up on firm, level ground, switch the engine off and apply the handbrake hard. Leave a manual in first gear and an automatic in ‘P’. Turn the hazard lights on, and leave the sidelights on too if visibility is poor.

Step 2 – Get everyone out and clear

Passengers should leave through the doors furthest from traffic and wait well away from the car — behind a barrier or up the verge. Nobody should sit inside a car that is about to be jacked up. Keep children and dogs together and away from the carriageway.

Step 3 – Chock the opposite wheel

Wedge a chock, brick or solid block in front of and behind the wheel diagonally opposite the flat one. If the front nearside tyre is down, chock the rear offside wheel. This stops the car creeping while it is balanced on a jack.

Step 4 – Lay the tools and the spare out first

Lay the tools and the spare out first

Lift out the spare, jack, brace and locking wheel nut key before you touch anything else, and slide the spare flat under the sill near the jacking point. If the car ever came off the jack, that wheel gives it something to land on instead of the ground — or your arm.

Do This Before You Lift

  • Prise off any plastic wheel trim or centre cap
  • Find the locking nut — it is the odd one out on the wheel
  • Check the brace grips each nut squarely before you apply any force

Step 5 – Loosen the wheel nuts while the tyre is still down

Loosen the wheel nuts while the tyre is still down

This is the step people get wrong. With the tyre still on the ground, turn each nut anticlockwise about half a turn — just enough to break it free, no more. The tyre’s grip on the road is what stops the wheel spinning. Try the same thing with the car in the air and the wheel simply turns with the brace.

If a nut refuses to move, position the brace so the bar sits horizontally, then press down on the end with your foot while holding the car for balance. Steady body weight works far better than a sharp yank, and it is much kinder to your knuckles.

Step 6 – Jack the car up

Jack the car up

Every car has reinforced jacking points, usually marked by a notch or an arrow in the sill just behind the front wheel and just ahead of the rear one. Your handbook shows exactly where. Putting a jack anywhere else can crush the sill or fold the floor pan, and that repair costs far more than the tyre did.

Raise the car slowly until the flat tyre sits roughly ten centimetres clear of the ground. You need that extra room because a fully inflated spare has a bigger diameter than the deflated tyre you are taking off.

Never Do Any of This

  • Never put any part of your body under a car held up by a jack
  • Never jack on a slope, a soft verge or loose gravel
  • Never leave the car raised while you wander off to find a tool
  • Never use the jack to hold the car while you work on anything else

Step 7 – Take the nuts and the wheel off

Take the nuts and the wheel off

Unscrew the loosened nuts by hand and put them somewhere they cannot roll away — a pocket, an upturned wheel trim or the footwell. Then pull the wheel straight towards you. Corrosion sometimes bonds the wheel to the hub; if it will not shift, lower the car until the tyre just kisses the ground and tap the tyre wall firmly with a rubber mallet or the sole of your boot.

Step 8 – Fit the spare

Lift the spare on with the valve facing outwards and line the bolt holes up with the studs. Wheels are heavier than they look, so lift with your legs rather than your back. Screw the nuts on by hand with the tapered edge facing the wheel, and nip them up finger-tight in a diagonal order so the wheel seats squarely against the hub.

Step 9 – Lower the car and tighten properly

Lower the car and tighten properly

Wind the jack down until the tyre takes the weight of the car, leaving the jack in light contact for a moment. Now tighten the nuts fully with the brace, working in a diagonal star pattern rather than round the circle. Even pressure keeps the wheel true and stops it running out of balance at speed.

Number of studs
Order to tighten them in
4 studs
Top, bottom, then the two sides — a simple cross
5 studs
Skip one nut each time, so the pattern draws a star
6 studs
Opposite pairs, working around in three rounds

Manufacturers publish a torque figure for wheel nuts, commonly somewhere between 90 and 130 Nm on a family car, though your handbook has the exact number for your vehicle. If you do not carry a torque wrench, tighten firmly by hand and have the nuts checked with one soon afterwards. Overtightening stretches studs; undertightening lets the wheel work loose.

Step 10 – Pack up and check the pressure

Take the jack and chocks away, put the flat wheel, tools and trim back in the boot, and check the spare’s pressure at the first opportunity. Spares lose air quietly over the years, and a soft one steers vaguely and wears out fast. Our tyre pressure guide sets out the figures to aim for.

The Checks That Matter Once the Spare Is On

The job is not finished when the jack comes out. These last few minutes are what stop a wheel loosening on the way home.

Before You Drive Away

  • Every wheel nut tightened, in a diagonal pattern
  • Spare pressure checked — space-savers often run much higher than a normal tyre, around 60 psi on many cars
  • Jack, brace, chocks and locking key all back in the car
  • The flat wheel stowed so it cannot roll around in the boot

Within the Next 25 Miles

  • Stop and re-check the wheel nuts — they can settle after the first few miles
  • Listen for knocking, and feel for a wobble coming through the steering wheel
  • Book the damaged tyre in for repair or replacement

Drive gently on a space-saver. Keep to 50 mph, leave more room for braking, and avoid motorway journeys if you can. And if the tyre went flat while you were driving, it is worth reading how far you can safely go — the short answer in our guide to driving with a flat tyre is almost never as far as people think.

Mistakes That Turn a Twenty-Minute Job Into a Bad Day

Almost every expensive roadside mishap comes from the same short list. None of them are obvious the first time you change a wheel, which is exactly why they keep happening.

The mistake
What tends to happen
Do this instead
Jacking up before loosening the nuts
The wheel spins and the nuts stay put
Break each nut free while the tyre is still on the ground
Jacking on a soft verge or a slope
The jack sinks or tips and the car drops
Move to firm, level ground first, even if it takes a minute
Putting the jack under a plain sill panel
The sill crushes and the repair runs into hundreds
Use the marked jacking point shown in the handbook
Tightening the nuts round in a circle
The wheel seats crooked and vibrates at speed
Tighten diagonally, in a star pattern
Overtightening with a scaffold bar
Studs stretch or snap and the next removal is far worse
Use the handbook torque figure, or have it checked
Driving 70 mph on a space-saver
Overheating, longer braking distances and rapid wear
Stick to 50 mph and replace it quickly
Skipping the pressure check
A soft spare handles badly and scrubs itself out
Check the pressure at the first garage you pass
Leaving the flat in the boot for months
A repairable puncture quietly turns into scrap
Book it in the same week

What If There Is No Spare Wheel in the Boot?

A large share of new cars sold in the UK now come with a sealant kit rather than a spare wheel. It is worth knowing what that kit can and cannot do before the day you need to rely on it.

What a sealant kit can handle

  • Small punctures in the tread, usually up to about 4 mm across
  • A nail or screw that is still sitting in the tyre
  • A slow leak where the tyre is still holding some shape

What it cannot handle

  • Cuts, splits or bulges in the sidewall — see sidewall damage explained
  • A tyre that has come away from the rim
  • A blowout, which is a different situation entirely — our emergency tyre burst guide covers that
  • Any damage bigger than a small puncture in the tread area

Sealant is also strictly temporary. It gets you to somewhere safe at reduced speed; it does not repair the tyre. Many fitters will decline to plug a tyre once it is full of sealant, so tell whoever fits your replacement that you have used it.

If your car runs on run-flats, there is no spare because the sidewalls are built to carry the car’s weight for a short distance after a puncture. Even then there are firm limits on speed and mileage, and a run-flat that has been driven on while flat is scrap rather than a repair job.

No Spare, No Problem

When there is nothing to fit, a mobile tyre fitter can come to your home or replace the tyre where the car stands, including at your workplace. That saves both a recovery truck and a garage trip.

When to Stop and Call Someone Out Instead

There is no prize for doing this yourself. Knowing how to change a flat tyre is useful; knowing when not to attempt it matters more. Several situations make a roadside wheel change a poor idea, and recognising them early saves a lot of standing around in the wet. A 24-hour mobile fitter can usually reach you faster than you would expect.

  • Fast traffic nearby. A motorway, dual carriageway or any road where vehicles pass close and quickly.
  • Poor ground. Soft, sloping or uneven, with nowhere better to move to.
  • The locking wheel nut key is missing, snapped or rounded off — here is what to do next.
  • A nut is seized solid and will not shift with reasonable effort.
  • The spare is flat, missing or the wrong size for the car.
  • The damage is a split or a burst rather than a simple puncture.
  • You are not in a position to do it — a bad back, limited mobility, small children with you, or darkness and nobody else around.
Your situation
Best option
Why
Flat on the driveway, usable spare
Change it yourself
Safe ground, no traffic and no waiting
Flat in a car park, no spare
Mobile tyre fitter
A new tyre fitted where the car already stands
Flat on a motorway hard shoulder
Recovery, then fitting
Working beside live lanes is never worth the risk
Locking nut key lost or damaged
Mobile fitter with removal tools
Specialist sockets take the nut off without wrecking the wheel
Two tyres damaged by one pothole
Mobile fitter
Both are done in a single visit — and pairs matter for grip
Sidewall bulge spotted before a trip
Book a replacement now
The tyre is unsafe even though it still holds air

If you are weighing up the options on cost and waiting time, our comparison of mobile tyre fitting against a garage visit and the breakdown of what mobile tyre fitting costs in the UK will both help you decide quickly.

What Happens to the Damaged Tyre Afterwards?

Once the spare is on, the punctured tyre still needs a decision: repair it, or replace it. That call is not really yours to guess at — it depends on where the damage sits and how much tread is left.

When a puncture can usually be repaired

  • The damage sits in the central tread area, not the shoulder or sidewall
  • The hole is no wider than about 6 mm
  • The tyre has not been driven on while flat
  • There is enough tread left to make the repair worth paying for

When it has to be replaced

  • Any cut, bulge or split in the sidewall
  • Cord or steel belt showing through the rubber
  • The tyre has run flat and the inner liner has broken up
  • The tread is at or close to the legal limit

In the UK the legal minimum tread depth is 1.6 mm across the central three-quarters of the tyre and right around its circumference. Below that, each illegal tyre can carry a fine of up to £2,500 and three penalty points. TyreSafe and most manufacturers suggest replacing at around 3 mm, because wet braking falls away sharply below that. Our guide to checking tyre tread depth shows the 20p test in a few seconds.

Quick Tip

Ask for the wheel to be balanced when the new tyre goes on. An unbalanced wheel shows up as a shimmy through the steering at around 50 to 60 mph, and it wears the tread unevenly. We cover it as part of wheel balancing and valve replacement, and the difference between alignment and balancing is worth two minutes of reading.

Tempted by a budget replacement? Read what to look for in part worn tyres first, then compare it against the best budget tyres and the best mid-range options before you commit.

Key Takeaways

  • Safety before the wheel. Firm, level ground, well away from traffic, everyone out of the car.
  • Order matters. Loosen the nuts before you lift; tighten them after you lower.
  • Jacking points only. Anywhere else on the sill will bend or crush.
  • Star pattern, then re-check. Tighten diagonally and check again within 25 miles.
  • A space-saver is temporary. 50 mph, short distances, replaced soon.
  • Know when to stop. No spare, a seized nut, a lost locking key or a motorway all mean calling for help.

One Last Check Tonight

Open the boot floor and look. Knowing whether you have a full-size spare, a space-saver or a bottle of sealant is the single most useful thing you can learn from this guide — and it takes about thirty seconds. Regular tyre maintenance checks and a look at preparing tyres for a long trip will stop most punctures becoming emergencies in the first place.

One Stop Solution: The Mobile Tyre Fitter

If the spare is on and the damaged tyre now needs a permanent fix, we handle the tyre replacement itself and come to you. Our vans carry everything needed to fit and balance a tyre on your driveway, outside your workplace or at the roadside, so there is no garage trip and no waiting room. If you already have the replacement tyre, we will simply fit it.

If you do not have one, we hold stock for cars, vans, light commercials, 4x4s and SUVs — from premium names such as Michelin and Continental through to dependable mid-range and budget choices — at competitive prices with no hidden charges. Our round-up of the best tyre brands is a useful starting point if you are not sure what to choose.

Same-day and next-day slots are available across our mobile tyre service areas, with rapid 24/7 cover for urgent and last-minute call-outs, including Sunday fitting. Send your tyre size and postcode to our support team and we will confirm the price and the arrival window before we set off — one stop, start to finish.

Popular call-out areas include London, Birmingham, Manchester, Leeds and Glasgow, with same-day fitting near you and next-day booking available nationwide.

Frequently Asked Questions About Changing a Tyre

How long does it take to change a tyre?

Allow twenty to thirty minutes the first time. Once you have done it before, fifteen minutes is realistic on a driveway. Most of that time goes on getting the spare out and loosening the first nut, not on the wheel change itself.

A mobile tyre fitter usually needs about thirty to forty-five minutes on site, including fitting and balancing the new tyre.

No. Traffic passes within a couple of feet at speed, and the draught from a lorry is enough to unbalance somebody crouching by a wheel.

Pull as far left as you can, get out through a left-hand door, move behind the safety barrier and call for help. Emergency roadside assistance exists precisely for this situation.

Not to get home, but yes for peace of mind. Wheel nuts have a specified torque — often between 90 and 130 Nm on a family car — and both overtightening and undertightening cause problems.

If you do not have one, tighten firmly by hand in a diagonal pattern and have the nuts checked with a torque wrench as soon as you can.

50 mph, or 80 km/h, unless the sticker on the wheel says otherwise. The narrow tyre has less grip, longer braking distances and a much shorter service life than a normal tyre.

Treat it as a get-you-home wheel and arrange a full-size replacement quickly.

Corrosion often bonds an alloy wheel to the hub. Lower the car until the tyre just touches the ground, then tap the tyre wall firmly with a rubber mallet or the sole of your boot, working around the wheel.

Never kick it while the car is fully raised, and never reach behind the wheel to lever it off.

Driving on a flat or badly damaged tyre makes the vehicle unroadworthy, which can bring a fine of up to £2,500 and three penalty points per tyre. It also destroys the tyre and can damage the wheel rim within a few hundred metres.

Move only as far as you need to reach a safe place to stop.

Only if the location is genuinely safe. You need firm ground, hazard lights, a torch and ideally a hi-vis vest, and you need to be well clear of moving traffic.

If any of that is missing, waiting for a fitter in a locked car is the better decision.

The wheel cannot be removed with ordinary tools. A mobile fitter carries extraction sockets that grip the damaged or unkeyed nut and remove it without damaging the alloy.

Main dealers can also supply a replacement key against your vehicle details, though that takes days rather than minutes.

Not for the spare itself, since it is temporary. But the new or repaired tyre should be balanced when it goes on the wheel.

An unbalanced wheel shows up as a vibration through the steering at around 50 to 60 mph and wears the tread unevenly.

It depends on how much tread is left on the tyre alongside it, the drivetrain layout and what the manufacturer recommends. Where the remaining tyre is well worn, replacing the pair keeps grip even across the axle.

A fitter can measure both and tell you honestly which applies.

Leave a Reply

Your email address will not be published. Required fields are marked *

Registered Office:

Mobile Tyre Fitter

Unit J20, Hastingwood Ind. Park Wood Ln, Birmingham, B24 9QR

© 2024 Mobile Tyre Fitter. All rights reserved.

Google
Google
4.7
verified by Trustindex
Trustindex verifies that the company has a review score above 4.5, based on reviews collected on Google over the past 12 months, qualifying it to receive the Top Rated Certificate.