How to Prepare Your Tyres for a Long Road Trip
The car is packed, the playlist is sorted and the cool box is wedged behind the passenger seat. The one thing almost nobody gives ten minutes to is the four patches of rubber that will carry all of it several hundred miles up the motorway.
Long journeys are unusually hard on tyres. You hold high speeds for hours instead of minutes, the boot is heavier than it has been all year, and hot tarmac drives up the temperature inside the rubber. A tyre that copes perfectly well with the school run can be a genuine liability at 70mph with a full load behind it.
The good news: a proper pre-trip tyre check takes about ten minutes, needs no tools beyond a pressure gauge and a 20p coin, and heads off the overwhelming majority of holiday breakdowns before they happen. Here is exactly what to do, in the order to do it.
Here’s what this guide covers:
Table of content:
Why Ten Minutes of Tyre Prep Is Worth It
The Only Part of Your Car That Touches the Road
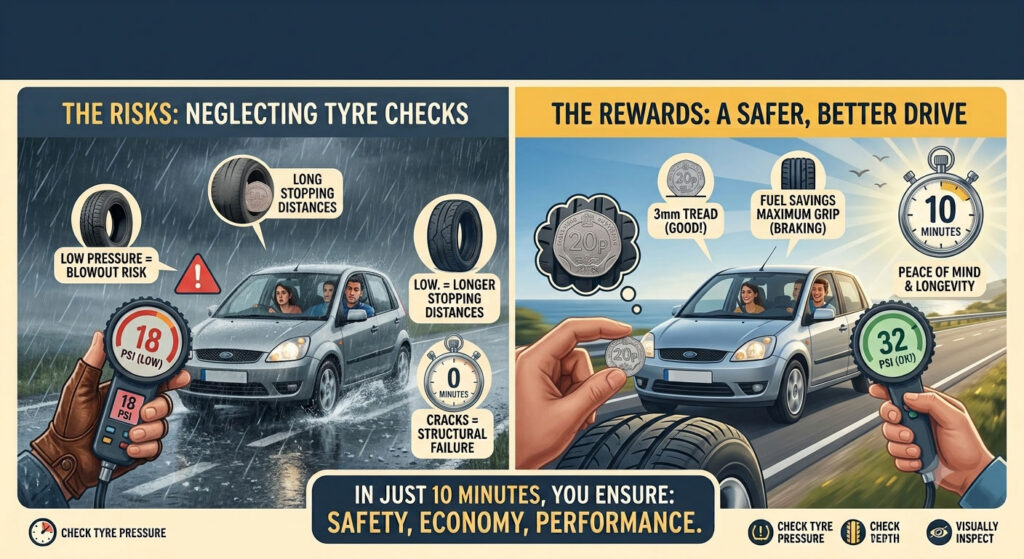
Every bit of steering, braking and accelerating your car does is transmitted through four contact patches, each roughly the size of the palm of your hand. Engine, brakes and traction control are all irrelevant if those patches cannot grip. It is the cheapest safety system on the vehicle and the one most often ignored.
What Neglected Tyres Actually Cost You
Under-inflated tyres have a higher rolling resistance, so the engine burns more fuel to hold the same speed — a slow, invisible tax on every mile of the trip. They also wear faster at the shoulders, shortening the life of an expensive set. Then there is the real bill: a motorway blowout, a ruined day, and a recovery truck. Set against that, a pressure check in the driveway is free.
If you want the wider maintenance picture, our guide to keeping your tyres in good shape year-round covers the habits that stop problems appearing in the first place.
Why Long Drives Punish Tyres Harder Than the Commute
Three things stack up on a road trip. Sustained motorway speed keeps the rubber flexing and hot for hours at a time. A boot crammed with suitcases, plus four or five people, pushes the load close to the vehicle’s maximum. And summer tarmac can be considerably hotter than the air temperature. Heat is what turns a small, existing weakness — slightly low pressure, a nick in the sidewall, tread near its limit — into a failure. That is the chain of events behind most motorway blowouts.
Quick Answer
Check pressures (cold), tread depth, sidewalls and your spare in the 48 hours before you leave. Adjust pressures upward for the extra load, and deal with anything that looks wrong before you set off, not at a service station 200 miles from home.
When to Do Each Check
Spreading the checks out means you still have time to fix whatever you find.
| When | What to do | Why then |
|---|---|---|
| 2 weeks before | Tread depth, sidewall inspection, tyre age | Leaves time to order and fit replacements without paying a rush premium |
| Night before | Wheel nut key, jack, spare wheel pressure | Finding a missing nut key at 6am on departure day ruins the start of a holiday |
| Morning of (cold) | Set all pressures, including the spare | Tyres must be cold for an accurate reading, and the car is now fully loaded |
Start With Pressure: The Single Biggest Win
If you only do one thing before a long drive, do this one. Pressure influences grip, braking, fuel consumption, wear rate and the tyre’s ability to shed heat — and it is the check people skip most.
Where to Find Your Correct PSI or BAR
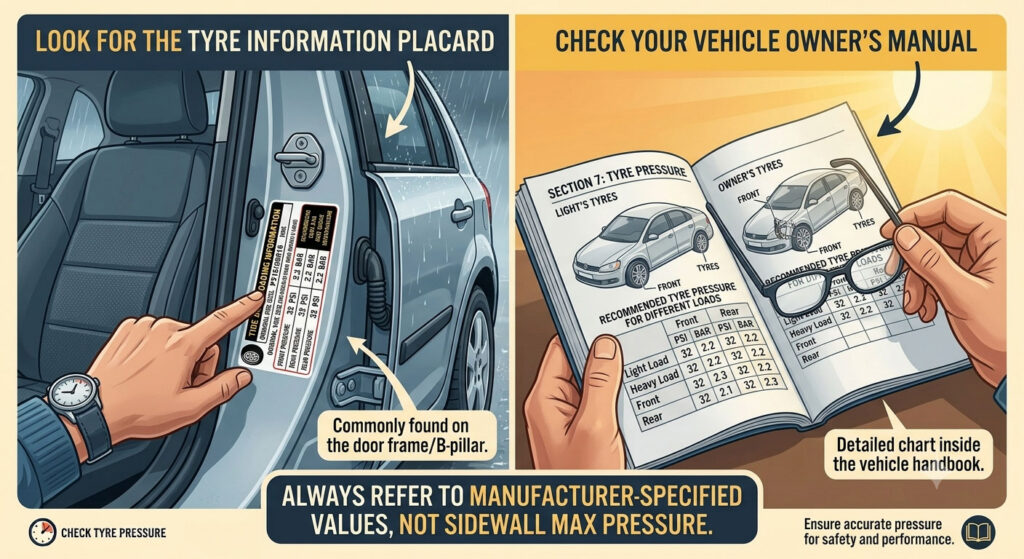
Do not guess, and do not copy a figure from a friend’s car. Every vehicle has its own numbers, printed on a placard in one of three places:
- The driver’s door jamb (open the door and look at the pillar)
- Inside the fuel filler flap
- The owner’s manual, usually in the technical data pages
Read that placard carefully. Most list two sets of figures: one for normal, everyday use and a higher one for a fully laden car. On a road trip you almost certainly want the second set.
The Golden Rule: Measure Them Cold
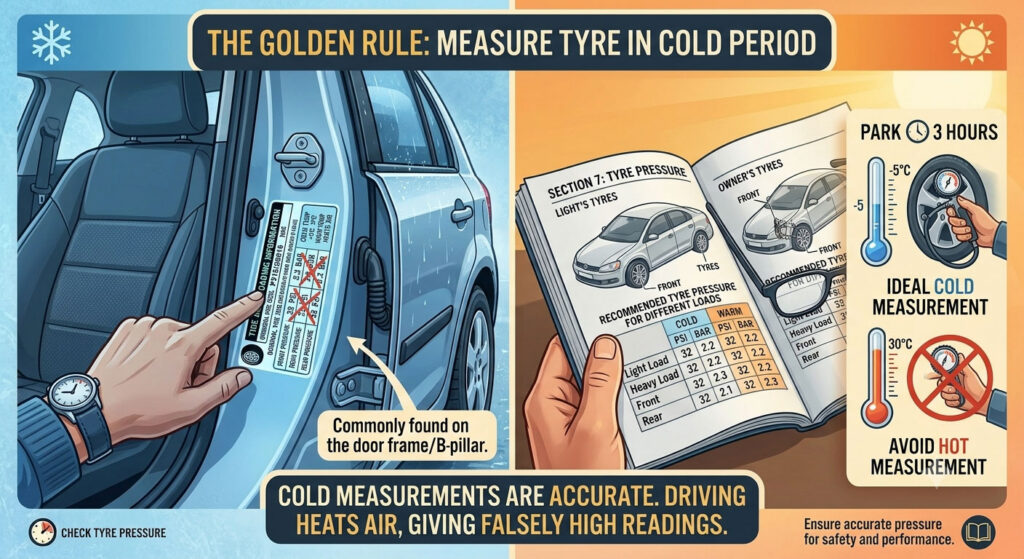
Air expands as it heats. Driving flexes the rubber, friction warms the air inside, and pressure climbs — often by several PSI. Check a warm tyre and it will read high, so you will ‘correct’ it by letting air out and drive away under-inflated without realising.
‘Cold’ means the car has been standing for at least a couple of hours, or has driven less than a mile or so. In practice: check on the driveway before you leave, not after a blast down the dual carriageway to the nearest air pump. If the only gauge you have is at a petrol station, drive there gently and accept it is a rough reading — or better still, keep a cheap gauge in the glovebox. Our full tyre pressure guide goes deeper on getting an accurate figure.
Too Little Air vs Too Much
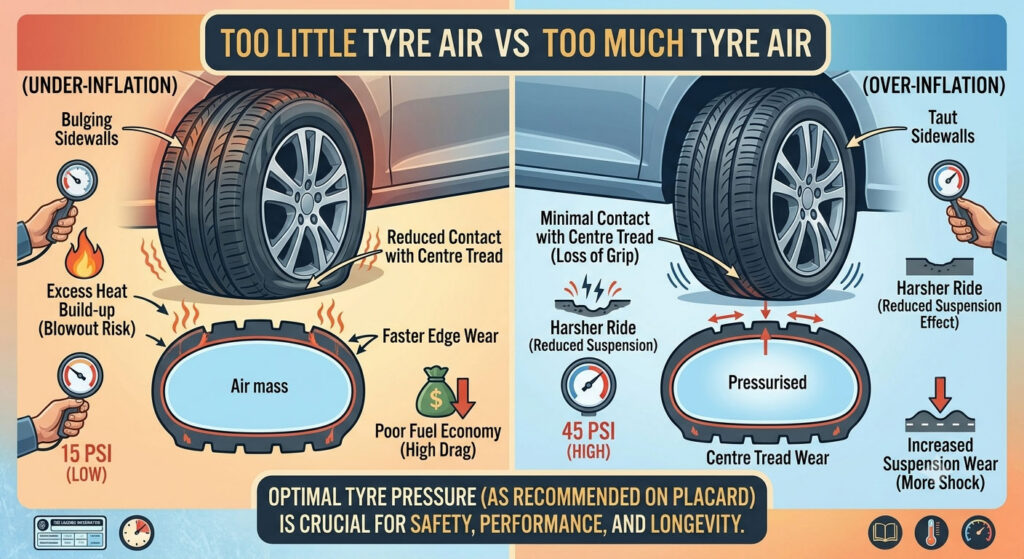
Both are bad, but they fail in different and equally unhelpful ways.
| Under-inflated | Over-inflated | |
|---|---|---|
| What happens | Sidewalls flex too much and build heat | Tyre goes rigid and rides on its centre band |
| Grip | Vague steering, sluggish response | Reduced contact patch, less grip and longer braking |
| Wear pattern | Both outer shoulders wear away | Centre of the tread wears away |
| Fuel | Higher rolling resistance, more fuel burnt | Marginally better, but not worth the trade-off |
| Worst case | Overheating and a sudden blowout at speed | Harsh ride and easy impact damage from potholes |
Quick Answer
Find the placard in the door jamb or fuel flap, use the laden figure if the car is packed, and set the pressures while the tyres are cold. Under-inflation is the more dangerous of the two errors because heat build-up is what causes blowouts.
A Packed Car Changes the Numbers
Holiday Luggage Counts, and It Adds Up Fast
Four adults, a boot full of cases and a roof box can easily add 300kg or more. That weight presses down on the same four tyres, squashing the sidewalls and making them flex further with every rotation. Flex means heat, and heat is what destroys tyres. Running standard pressures under a full load is effectively running under-inflated.
This is precisely why the manufacturer prints a higher ‘full load’ pressure. Use it. Towing a caravan or trailer? Check the handbook again, because towing often has its own figures, and the caravan’s own tyres need checking too.
Reading the Load Index on the Sidewall
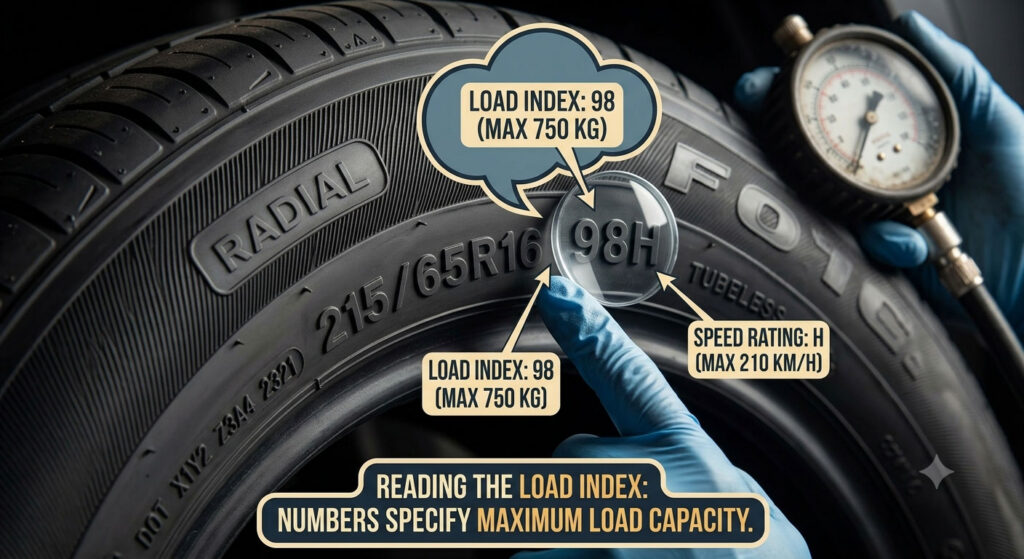
Look at the code on your tyre’s sidewall, e.g. 205/55 R16 91V. The two digits after the rim size — 91 here — are the load index: the maximum weight that tyre can carry. The letter after it (V) is the speed rating. Never fit a replacement with a lower load index or speed rating than the original, and if you regularly run heavily loaded you may need XL (Extra Load) tyres. If any of this is unclear, our rundown of what separates one tyre from another is a useful primer before you buy.
| Situation | Pressure to use | Also worth doing |
|---|---|---|
| Driving solo or with one passenger, light boot | Standard / normal-load figure | Re-check monthly |
| Full car, boot packed, heading away for a week | The higher full-load figure on the placard | Include the spare in the check |
| Roof box or roof rack fitted | Full-load figure, and mind the speed limit for the box | Recheck after the first hour of driving |
| Towing a caravan or trailer | Handbook towing figures for the car | Check the trailer's own tyres and their age |
Change Them Back When You Unpack
Easy to forget, and worth remembering. Once you have unloaded at the other end and are pottering around locally with an empty car, those raised pressures now count as over-inflation: a smaller contact patch, a harsher ride and accelerated wear down the centre of the tread. Drop them back to the standard figures for everyday driving, then raise them again for the journey home.
Expert Tip
Photograph the placard in your door jamb with your phone. Both sets of figures are then in your pocket at any air pump in the country, and you will never squint at a faded sticker in a dark car park again.
Tread Depth: Legal Is Not the Same as Safe
1.6mm Is the Law. 3mm Is the Advice.
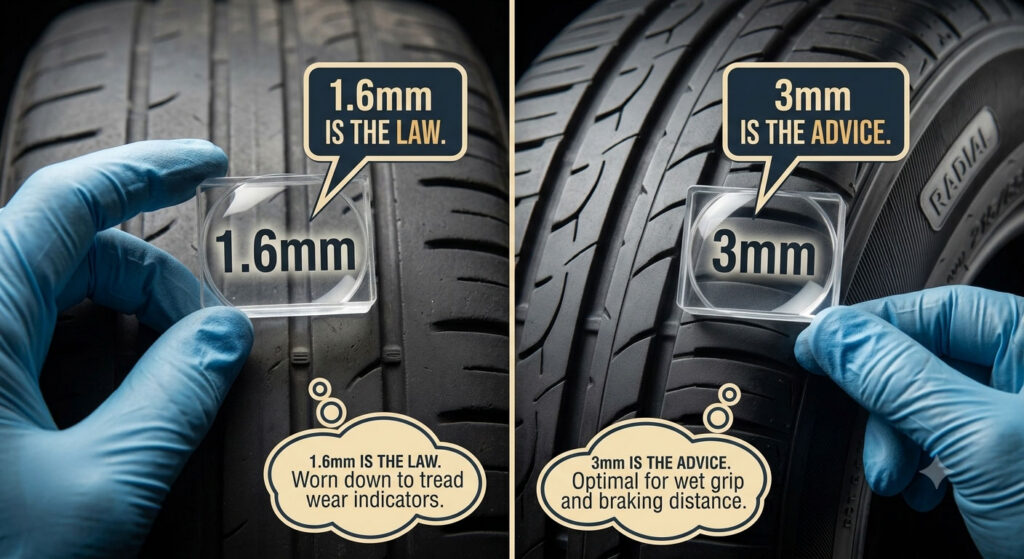
In the UK the legal minimum tread depth for a car is 1.6mm, measured across the central three-quarters of the tyre and right around the circumference. Below that you risk a fine of up to £2,500 and three penalty points per tyre, plus an automatic MOT failure.
But legal and safe are different things. Testing by MIRA found that wet braking distances lengthen sharply once tread drops under 3mm — the gap between a 3mm tyre and one worn to the 1.6mm limit can be as much as 44% further to stop in the wet. That is why TyreSafe and most manufacturers advise replacing at 3mm rather than running to the limit.
On a summer road trip, where you may hit torrential rain and standing water hundreds of miles from home, that margin matters enormously.
| Tread depth | Status | What to do before a long trip |
|---|---|---|
| Below 1.6mm | Illegal — fine, points, MOT failure | Replace before you drive anywhere |
| 1.6mm – 2mm | Legal, but wet grip is badly compromised | Replace before departure |
| 2mm – 3mm | Legal, entering the danger zone | Strongly consider replacing, especially for a long motorway run |
| 3mm – 4mm | Acceptable | Fine to travel, but check again when you get back |
| Above 4mm | Healthy | Good to go |
The 20p Coin Test, Step by Step
No gauge? A 20p coin works, because its outer band is just under 3mm wide.
- Take a 20p coin and push it into one of the main grooves of the tread.
- Look at the coin. If the outer band is hidden by the tread, you have more than roughly 3mm and you are fine.
- If you can see the outer band, the tread is getting low and the tyre needs a professional look.
- Repeat at the inner, middle and outer edge of each tyre — and do all four, not just the fronts.
Front tyres usually wear faster than rears. Our step-by-step on checking tread depth properly shows what to look for at each point.
When the Wear Isn't Even
This is the check people miss. A tyre can be perfectly legal in the middle and bald on the inner edge, where you cannot see it without turning the wheel to full lock and looking. Uneven wear is never random — it is your car telling you something else is wrong, and simply fitting a new tyre without fixing the cause will just chew the new one up too.
| What you see | What it usually means | Action |
|---|---|---|
| Both shoulders worn, centre fine | Chronic under-inflation | Correct the pressure and monitor |
| Centre strip worn, shoulders fine | Chronic over-inflation | Correct the pressure and monitor |
| One edge only (inner or outer) | Wheel alignment is out | Alignment check before the trip |
| Patchy, scalloped or cupped wear | Wheel imbalance or worn suspension | Balancing check; suspension inspection if it persists |
| Flat spot in one place | Heavy braking or a locked wheel | Replace — it will vibrate at speed |
Quick Answer
Legal minimum is 1.6mm, but replace at 3mm for real-world wet safety. Use a 20p coin: if the outer band shows, get the tyre looked at. Check all four tyres, across the full width of each.
The Five-Minute Walk-Around: What to Look For
Pressure and tread are numbers. This bit is about your eyes and hands. Do it in daylight, and turn the steering onto full lock so you can actually see the inner shoulders of the front tyres.
Sidewall Damage: Cracks, Cuts and Bulges
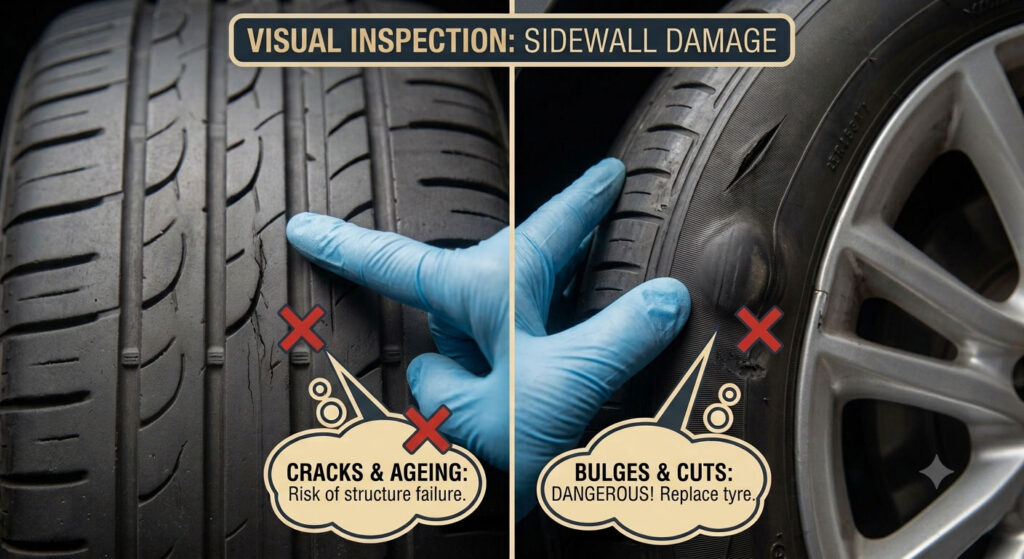
The sidewall has no tread to protect it and is the thinnest part of the tyre. Run your palm over it and look closely for:
- Bulges or blisters — an egg-shaped lump means the internal structure has failed and air is pushing into the outer rubber. This tyre can let go without warning. Do not drive on it.
- Cuts, slices or gouges — especially anything deep enough to expose the cords underneath.
- Fine crazing or cracking — the rubber has aged and hardened, common on cars that sit unused.
None of these can be repaired. A damaged sidewall means a new tyre, full stop — our explainer on why sidewall damage is so serious sets out exactly why.
Picking Out Stones, Glass and Screws
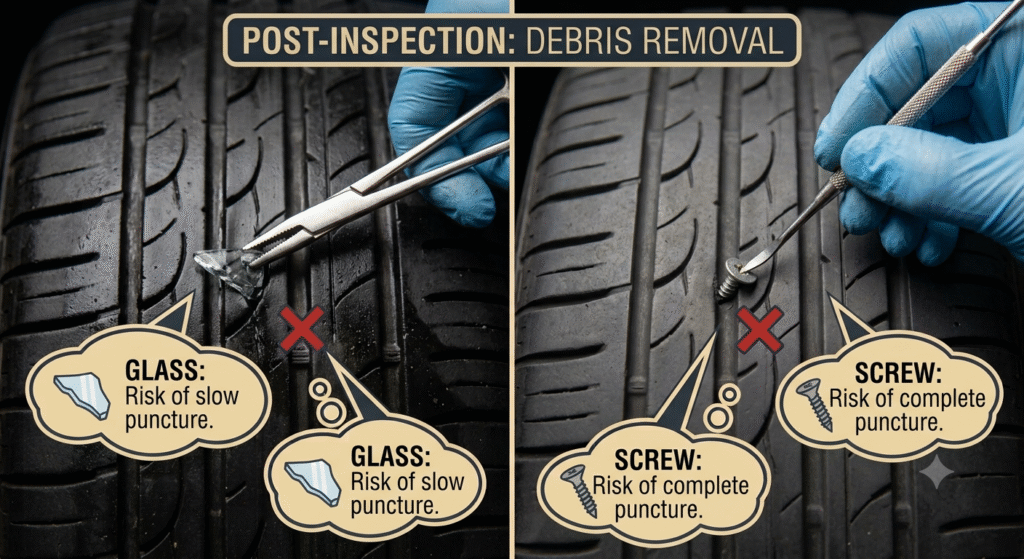
Crouch down and look across the tread blocks. Grit and small stones wedged in the grooves are usually harmless and can be flicked out. What you are really hunting for is anything metal: a screw head, a nail, a shard of glass sitting proud of the rubber.
Do not pull it out and hope. A nail can plug its own hole for weeks, then let go on the motorway. If you find an embedded object, treat the tyre as compromised and have it assessed and replaced before you travel — not after it strands you in an unfamiliar county.
How Old Are Your Tyres? Read the DOT Code
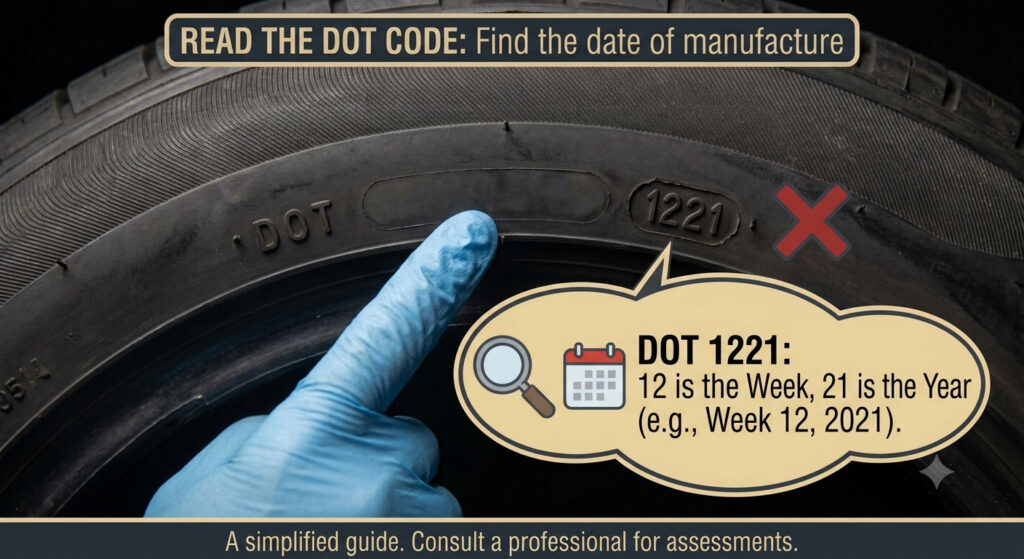
Rubber perishes whether you drive on it or not. UV light and time make it brittle, so a five-year-old tyre with lovely deep tread can still be past its best — a real trap for second cars, classics and caravans that sit still for months.
Find the DOT code on the sidewall. The last four digits are the manufacture date: 2621 means week 26 of 2021. As a rule of thumb, get tyres over five years old inspected, and treat anything past ten years as due for replacement regardless of how it looks. There is more in our piece on how long tyres actually last.
| What you find | How serious | What to do |
|---|---|---|
| Bulge or egg-shaped lump in sidewall | Critical — failure imminent | Do not drive. Replace the tyre. |
| Cut deep enough to show cords | Critical | Replace before travelling |
| Screw or nail embedded in tread | Serious | Leave it in place; have the tyre assessed and replaced |
| Fine cracks across the sidewall | Ageing rubber | Check the DOT date; replace if over five years |
| Small stones in the grooves | Harmless | Flick them out with a screwdriver |
| Valve cap missing | Minor but worth fixing | Fit a new cap — they cost pennies |
Important Reminder
A bulge in the sidewall is not a ‘watch it and see’ fault. It means the casing has already failed internally. Tyres in that condition are replaced, never patched — and it is far cheaper to do it on your driveway than on a hard shoulder.
Your Backup Plan: Spare, Jack and Nut Key
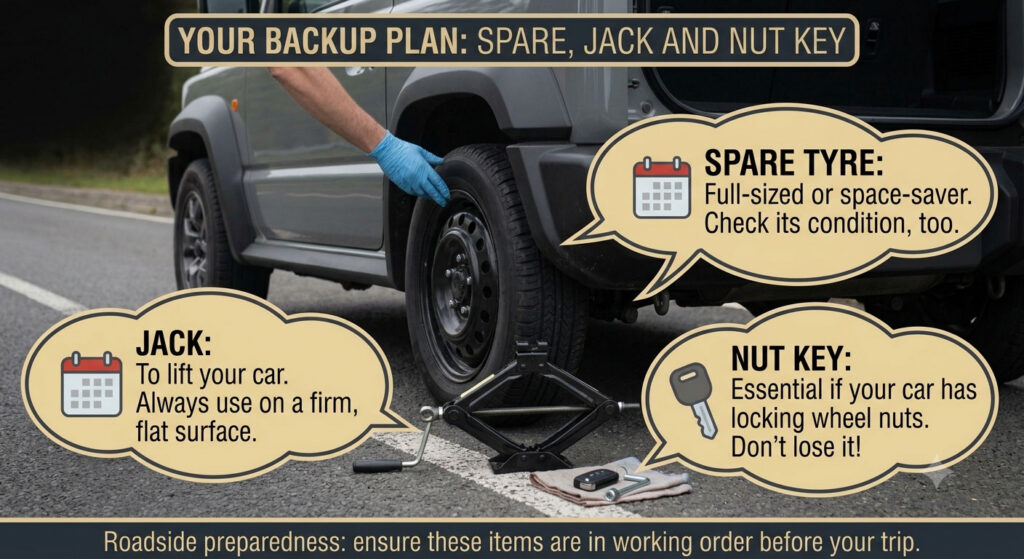
Here is the cruel irony of the spare wheel: it sits under the boot floor for years, ignored, quietly losing pressure — and the one day you need it, it is flat. Checking it takes sixty seconds.
Is the Spare Actually Roadworthy?
Lift the boot floor and genuinely look at it. Three things:
- Pressure. Spares, especially space-savers, often need a much higher pressure than the road tyres — sometimes 60 PSI. The figure is printed on the spare itself or on the placard. Check it cold, along with the others.
- Tread and condition. A spare with cracked, perished rubber is not a spare; it is ballast.
- Speed limit. Space-saver spares are usually restricted to 50mph and short distances. They are there to get you to help, not to complete your holiday on.
The Toolkit Checklist
A spare wheel is useless without the kit to fit it. Find all of this before you leave, not in the dark on a verge:
| Item | Where it usually lives | Check that… |
|---|---|---|
| Jack | Under the boot floor, or in a side compartment | It is complete, winds freely and isn't seized |
| Wheel brace | Alongside the jack | It actually fits your wheel nuts |
| Locking wheel nut key | Boot, glovebox, or under a seat | It is present — this is the one that catches people out |
| Warning triangle / hi-vis | Boot | Present, and legally required in parts of Europe |
| Tyre pressure gauge | Glovebox | Batteries work, if digital |
The locking wheel nut key deserves special mention: without it, nobody — not you, not a mobile fitter, not a recovery driver — can get the wheel off quickly. If yours has vanished, sort it now. Our guide on what to do when the locking wheel nut key is missing explains the options. And if you have never actually done it, changing a wheel step by step is worth ten minutes of reading before you go.
No Spare? Check the Sealant Kit's Expiry Date
Many modern cars ship with a sealant-and-compressor kit instead of a spare wheel. Two things people never do: check the expiry date on the sealant canister (the gunk has a shelf life, typically four to five years) and test that the 12V compressor still runs when plugged into the socket.
Be clear about what these kits are, though. They are a temporary, get-you-moving measure for small tread punctures only — they will do nothing for a sidewall tear or a blowout, and the tyre still needs replacing afterwards. Treat the kit as a way to reach help, not as a fix.
Expert Tip
Physically put your hands on the jack, brace and locking wheel nut key before you load the boot. It takes two minutes and it is the single most commonly discovered problem at the roadside.
Red Flags That Mean 'See Someone Before You Go'
Some faults are not visible at all — you feel them through the car. If any of the following are happening, get them dealt with before a long drive, because motorway speeds will only amplify them.
Vibration Through the Steering Wheel
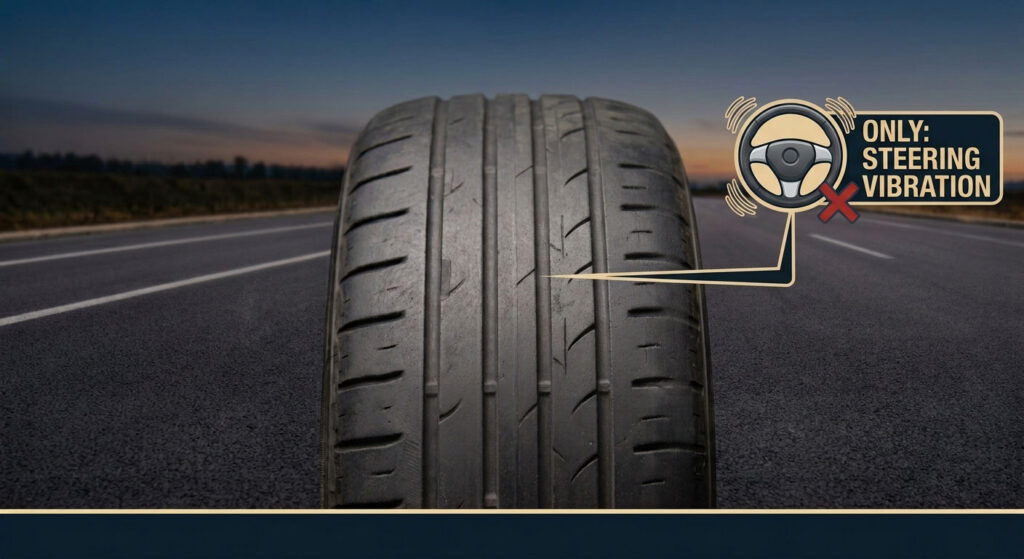
A shimmy or wobble that appears at a particular speed — classically somewhere between 50 and 70mph — usually points to a wheel that is out of balance. Even a few grams in the wrong place spins into a noticeable vibration at speed. Left alone, it wears the tyre unevenly and hammers your suspension and wheel bearings for hour after hour of motorway driving.
The Car Pulls to One Side
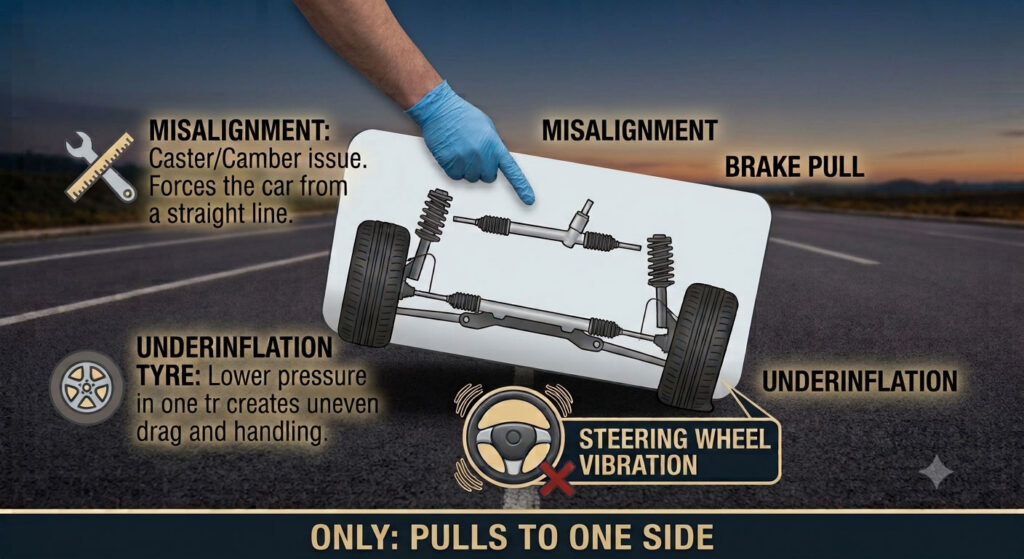
Let the wheel go momentarily on a flat, straight road. If the car drifts steadily left or right, the alignment is out. It scrubs the edge off your tyres, costs you fuel, and forces you to hold a constant correction for the whole journey — which is exhausting over 300 miles.
Balancing and alignment are different jobs and fix different problems — our comparison of alignment versus balancing explains which one you need. We can handle wheel balancing and valve replacement at your home or workplace, so it need not cost you a day off.
Missing Valve Caps
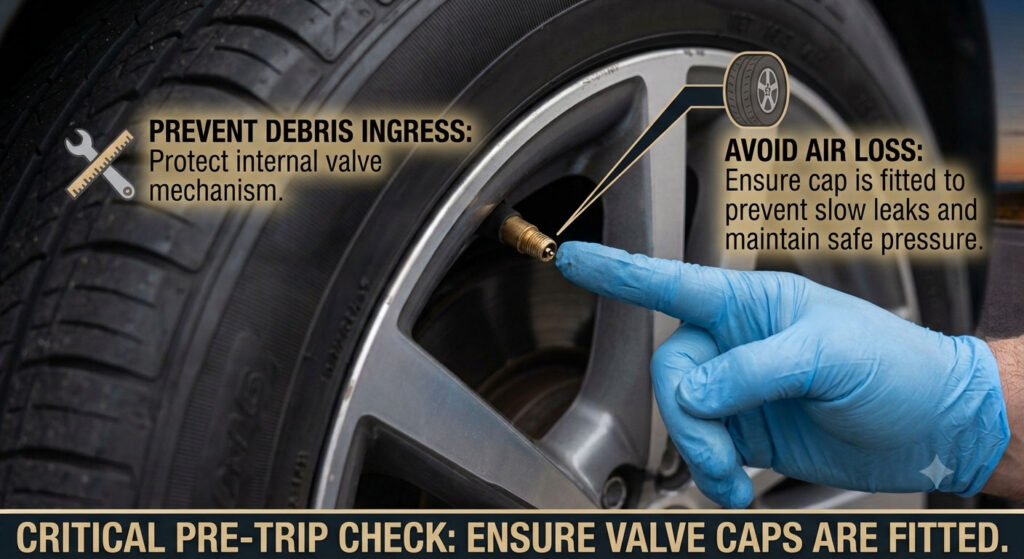
It looks trivial. It isn’t. The valve cap keeps grit, road salt and moisture out of the valve core, and that core is the only thing holding the air in. Contaminate it and it can weep air slowly for weeks, leaving you chronically under-inflated without ever seeing an obvious flat. Caps cost pennies. Replace any that are missing.
| Symptom | Likely cause | Fix before you travel |
|---|---|---|
| Steering wobbles at 50–70mph | Wheel out of balance | Wheel balancing |
| Car pulls to one side on a straight road | Wheel alignment out | Alignment check |
| Uneven wear on one tyre edge | Alignment, or worn suspension | Alignment; suspension inspection |
| TPMS warning light on the dash | One or more tyres losing pressure | Find the leak — do not just reinflate and ignore it |
| Tyre keeps going soft over days | Contaminated valve, or a slow leak | Have the tyre and valve inspected |
| Roaring or droning that rises with speed | Irregular wear, or a wheel bearing | Get it inspected before a long run |
Quick Answer
Vibration at speed means balancing. Pulling to one side means alignment. A dash warning light means a real leak. None of these fix themselves on the motorway, and all of them get worse the further you drive.
Frequently Asked Questions
Do the inspection — tread, sidewalls, tyre age — about two weeks out, so there is time to get replacements fitted without paying a premium for urgency. Then set your pressures on the morning you leave, with the car packed and the tyres cold. That way the numbers reflect the actual weight you will be carrying.
No — use the manufacturer’s full-load figure rather than inventing your own. That figure already accounts for a heavily laden car at sustained speed. Going beyond it shrinks the contact patch, reduces grip and makes impact damage from potholes far more likely. The placard in the door jamb is the authority, not guesswork.
Legally you can drive on them. In practice, for a long trip in unpredictable weather, it is a poor bet. Wet braking falls off sharply below 3mm, and a summer downpour on an unfamiliar motorway is exactly the situation where you will want that grip. Most drivers who replace at 3mm never regret it.
Yes. A roof box adds weight high up and changes how the car loads its tyres, so use the full-load pressures. Roof boxes also carry their own maximum speed recommendation, and the extra drag means the engine and tyres are working harder for the whole journey. Recheck pressures after the first hour or so of driving.
Look for the DOT code on the sidewall. The final four digits give the week and year of manufacture — 0323 is the third week of 2023. Rubber degrades with age even when unused, so tyres over five years old deserve a proper inspection, and anything approaching ten years should be replaced no matter how much tread remains.
That is precisely what a mobile fitter is for. Rather than losing a morning to a garage waiting room, we come to your house or workplace and fit the tyres there. Book a same-day slot, or arrange fitting on your driveway at a time that suits. If the worst happens once you are already on the road, our roadside team can reach you where you have stopped.
Key Takeaways
Before any long drive, in priority order:
- Pressure — cold, using the full-load figure if the car is packed. The single biggest win.
- Tread — 1.6mm is the law, 3mm is the sensible replacement point. Check all four, right across the width.
- Sidewalls — bulges, cuts and cracks mean a new tyre, not a repair.
- Debris — anything metal in the tread needs professional attention before you go.
- Spare and tools — including the locking wheel nut key.
- Red flags — vibration, pulling, or a warning light all mean ‘sort it first’.
The 5-Minute Pre-Ignition Checklist
✓ All four pressures set cold, to the laden figure
✓ Spare wheel checked and inflated
✓ 20p test passed on every tyre
✓ Sidewalls clear of bulges, cuts and cracks
✓ Tread free of nails, screws and glass
✓ Valve caps all present
✓ Jack, brace and locking wheel nut key located
✓ No vibration, pulling or dashboard warnings
Final Thoughts
Nobody sets off on holiday planning to spend an afternoon on a hard shoulder. The drivers who avoid it are rarely luckier — they simply spent ten minutes on the driveway looking at their tyres while everyone else was arguing about the sat nav. Pressure, tread, sidewalls, spare. That is the whole job.
For route and traffic planning before you set off, National Highways is the place to check conditions, and the RAC’s tread guidance is a solid second opinion on the 20p test.
And if a check throws up something you would rather not drive on, we will come to you. We fit tyres at homes, workplaces and roadsides across the country — see where we cover, compare a mobile fitter against a garage, or simply get in touch and we will sort it before you leave.